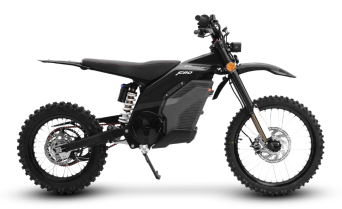
Unveiling the Future: Assembling Your Caofen F80 Electric Motorcycle
Introduction: Welcome to the Caofen F80 Assembly Experience
Welcome to the exciting assembly journey of your Caofen F80 electric motorcycle! In this comprehensive guide, we will take you through each step of the unboxing and assembly process, ensuring that you’re ready to hit the road with your new electric ride. For a visual walkthrough, you can watch the assembly video on YouTube here.
1. Cutting the Ties: Release the Box with Precision
The first step is to cut the straps fastening the box, setting the stage for the grand reveal. Open the box carefully, savoring the anticipation as you prepare to unveil your sleek and innovative Caofen F80.
2. Unwrapping the Beauty: Removing Protective Plastic
Smoothly cut through the protective plastic enveloping your motorcycle, and with a satisfying pull, watch as the layers of packaging are removed, exposing the futuristic design of the F80.
3. Discovering the Essentials: Unveiling the Accessory Box
Open the accompanying small box to discover a toolkit and other essential accessories. Take note of the contents, ensuring you have everything needed for a seamless assembly process.
4. Preparing for Assembly: Unscrewing the Protective Film
Equip yourself with the wrench to unscrew the protective film and begin the process of revealing the full glory of your Caofen F80. Continue by removing bolts around the film, clearing the way for the next steps.
5. Building the Foundation: Installing the Handlebar
Change the skewer size, loosen the bolts on the faceplate, release it, and mount the handlebar. Secure the faceplate over the bars, ensuring a tight fit to eliminate any potential wobbling.
6. Front Wheel Installation: Guiding You Through the Process
To install the front wheel, gently unscrew the bolts, remove the side nuts, and separate the clamp and forks. Insert the flanged axle nuts, position the wheel in the middle of the forks, and ensure both sides of the axle are fully engaged in fork dropouts. Tighten the clamp and nuts securely.
7. Adding the Final Touch: Installing the Fender
Make sure the fender is correctly positioned before securing it tightly with a wrench and skewer. Attention to detail is key as you aim for a polished and professional finish.
8. Connecting the Components: Headlight, Footrest, and Rear View Mirrors
Connect the headlight cable and position the footrest, ensuring flexibility. Install the footrest directly on the e-motorcycle, fix the rearview mirrors onto the handlebar using a wrench, and secure the other mirror.
9. Testing the Features: Remote Control and Lights
Explore the alarm system remote control, hop on your e-motorcycle, and press the power button. Use the remote to turn on the display, and test the headlights, indicators, tail light, and all other switches. Ensure everything operates smoothly.
Conclusion: Ready for the Ride
With the seat protective cover removed, your fully assembled Caofen F80 electric motorcycle is ready for a joyous ride. Press the power button, embrace the future of electric riding, and embark on thrilling adventures with your new F80. Safe travels! For a visual guide, don’t forget to watch the assembly video on YouTube here.

Waterproof Electric Motorcycles: Caofen F80
Explore the waterproof capabilities of electric motorcycles, focusing on the Caofen F80 with its IP67 rating.
Mar 05 2025
Top Electric Motorcycles 2025
Discover the best electric motorcycles of 2025, from Caofen FX to SurRon and Harley-Davidson.
Feb 27 2025
